Spring Boot项目快速搭建的核心就在于自动配置的原理,在自动配置的基础上,我们在创建项目的时候就可以选择包含哪些依赖,极大地提高了构建项目的效率。而要熟练掌握Spring Boot的使用,就必须要理解自动配置的原理,我们还从Spring Boot启动的时候加载的主配置类说起。
原理 Spring Boot应用启动时加载主配置类 1 2 3 4 5 6 @SpringBootApplication public class SpringBootHelloQuickApplication public static void main (String[] args) SpringApplication.run(SpringBootHelloQuickApplication.class, args); } }
它主要加载了@SpringBootApplication注解主配置类,这个@SpringBootApplication注解主配置类里边最主要的功能就是Spring Boot开启了一个@EnableAutoConfiguration注解的自动配置功能。
@EnableAutoConfiguration注解的作用 它主要利用了EnableAutoConfigurationImportSelector选择器给Spring容器中来导入一些组件。
1 2 3 4 5 6 7 8 9 10 11 12 13 @Target ({ElementType.TYPE})@Retention (RetentionPolicy.RUNTIME)@Documented @Inherited @AutoConfigurationPackage @Import ({AutoConfigurationImportSelector.class})public @interface EnableAutoConfiguration { String ENABLED_OVERRIDE_PROPERTY = "spring.boot.enableautoconfiguration" ; Class<?>[] exclude() default {}; String[] excludeName() default {}; }
查看selectImports()方法源码,导入了哪些组件 1 2 3 4 5 6 7 8 9 10 11 12 13 14 15 16 17 18 19 20 21 22 23 24 25 public String[] selectImports(AnnotationMetadata annotationMetadata) { if (!this .isEnabled(annotationMetadata)) { return NO_IMPORTS; } else { AutoConfigurationMetadata autoConfigurationMetadata = AutoConfigurationMetadataLoader.loadMetadata(this .beanClassLoader); AutoConfigurationImportSelector.AutoConfigurationEntry autoConfigurationEntry = this .getAutoConfigurationEntry(autoConfigurationMetadata, annotationMetadata); return StringUtils.toStringArray(autoConfigurationEntry.getConfigurations()); } } protected AutoConfigurationImportSelector.AutoConfigurationEntry getAutoConfigurationEntry (AutoConfigurationMetadata autoConfigurationMetadata, AnnotationMetadata annotationMetadata) { if (!this .isEnabled(annotationMetadata)) { return EMPTY_ENTRY; } else { AnnotationAttributes attributes = this .getAttributes(annotationMetadata); List<String> configurations = this .getCandidateConfigurations(annotationMetadata, attributes); configurations = this .removeDuplicates(configurations); Set<String> exclusions = this .getExclusions(annotationMetadata, attributes); this .checkExcludedClasses(configurations, exclusions); configurations.removeAll(exclusions); configurations = this .filter(configurations, autoConfigurationMetadata); this .fireAutoConfigurationImportEvents(configurations, exclusions); return new AutoConfigurationImportSelector.AutoConfigurationEntry(configurations, exclusions); } }
在selectImports这个方法里面有一个configurations,并且这个configurations最终会被返回,这个configurations它就是获取候选的配置。
1 List<String> configurations = this .getCandidateConfigurations(annotationMetadata, attributes);
返回configurations的时候它会调用当前对象的getCandidateConfigurations()方法,我们进入到该方法源码中查看。
1 2 3 4 5 protected List<String> getCandidateConfigurations (AnnotationMetadata metadata, AnnotationAttributes attributes) List<String> configurations = SpringFactoriesLoader.loadFactoryNames(this .getSpringFactoriesLoaderFactoryClass(), this .getBeanClassLoader()); Assert.notEmpty(configurations, "No auto configuration classes found in META-INF/spring.factories. If you are using a custom packaging, make sure that file is correct." ); return configurations; }
这个getCandidateConfigurations()方法的作用就是利用SpringFactoriesLoader.loadFactoryNames从类路径下得到一个资源。
1 2 Enumeration<URL> urls = classLoader != null ? classLoader.getResources("META-INF/spring.factories" ) : ClassLoader.getSystemResources("META-INF/spring.factories" ); LinkedMultiValueMap result = new LinkedMultiValueMap();
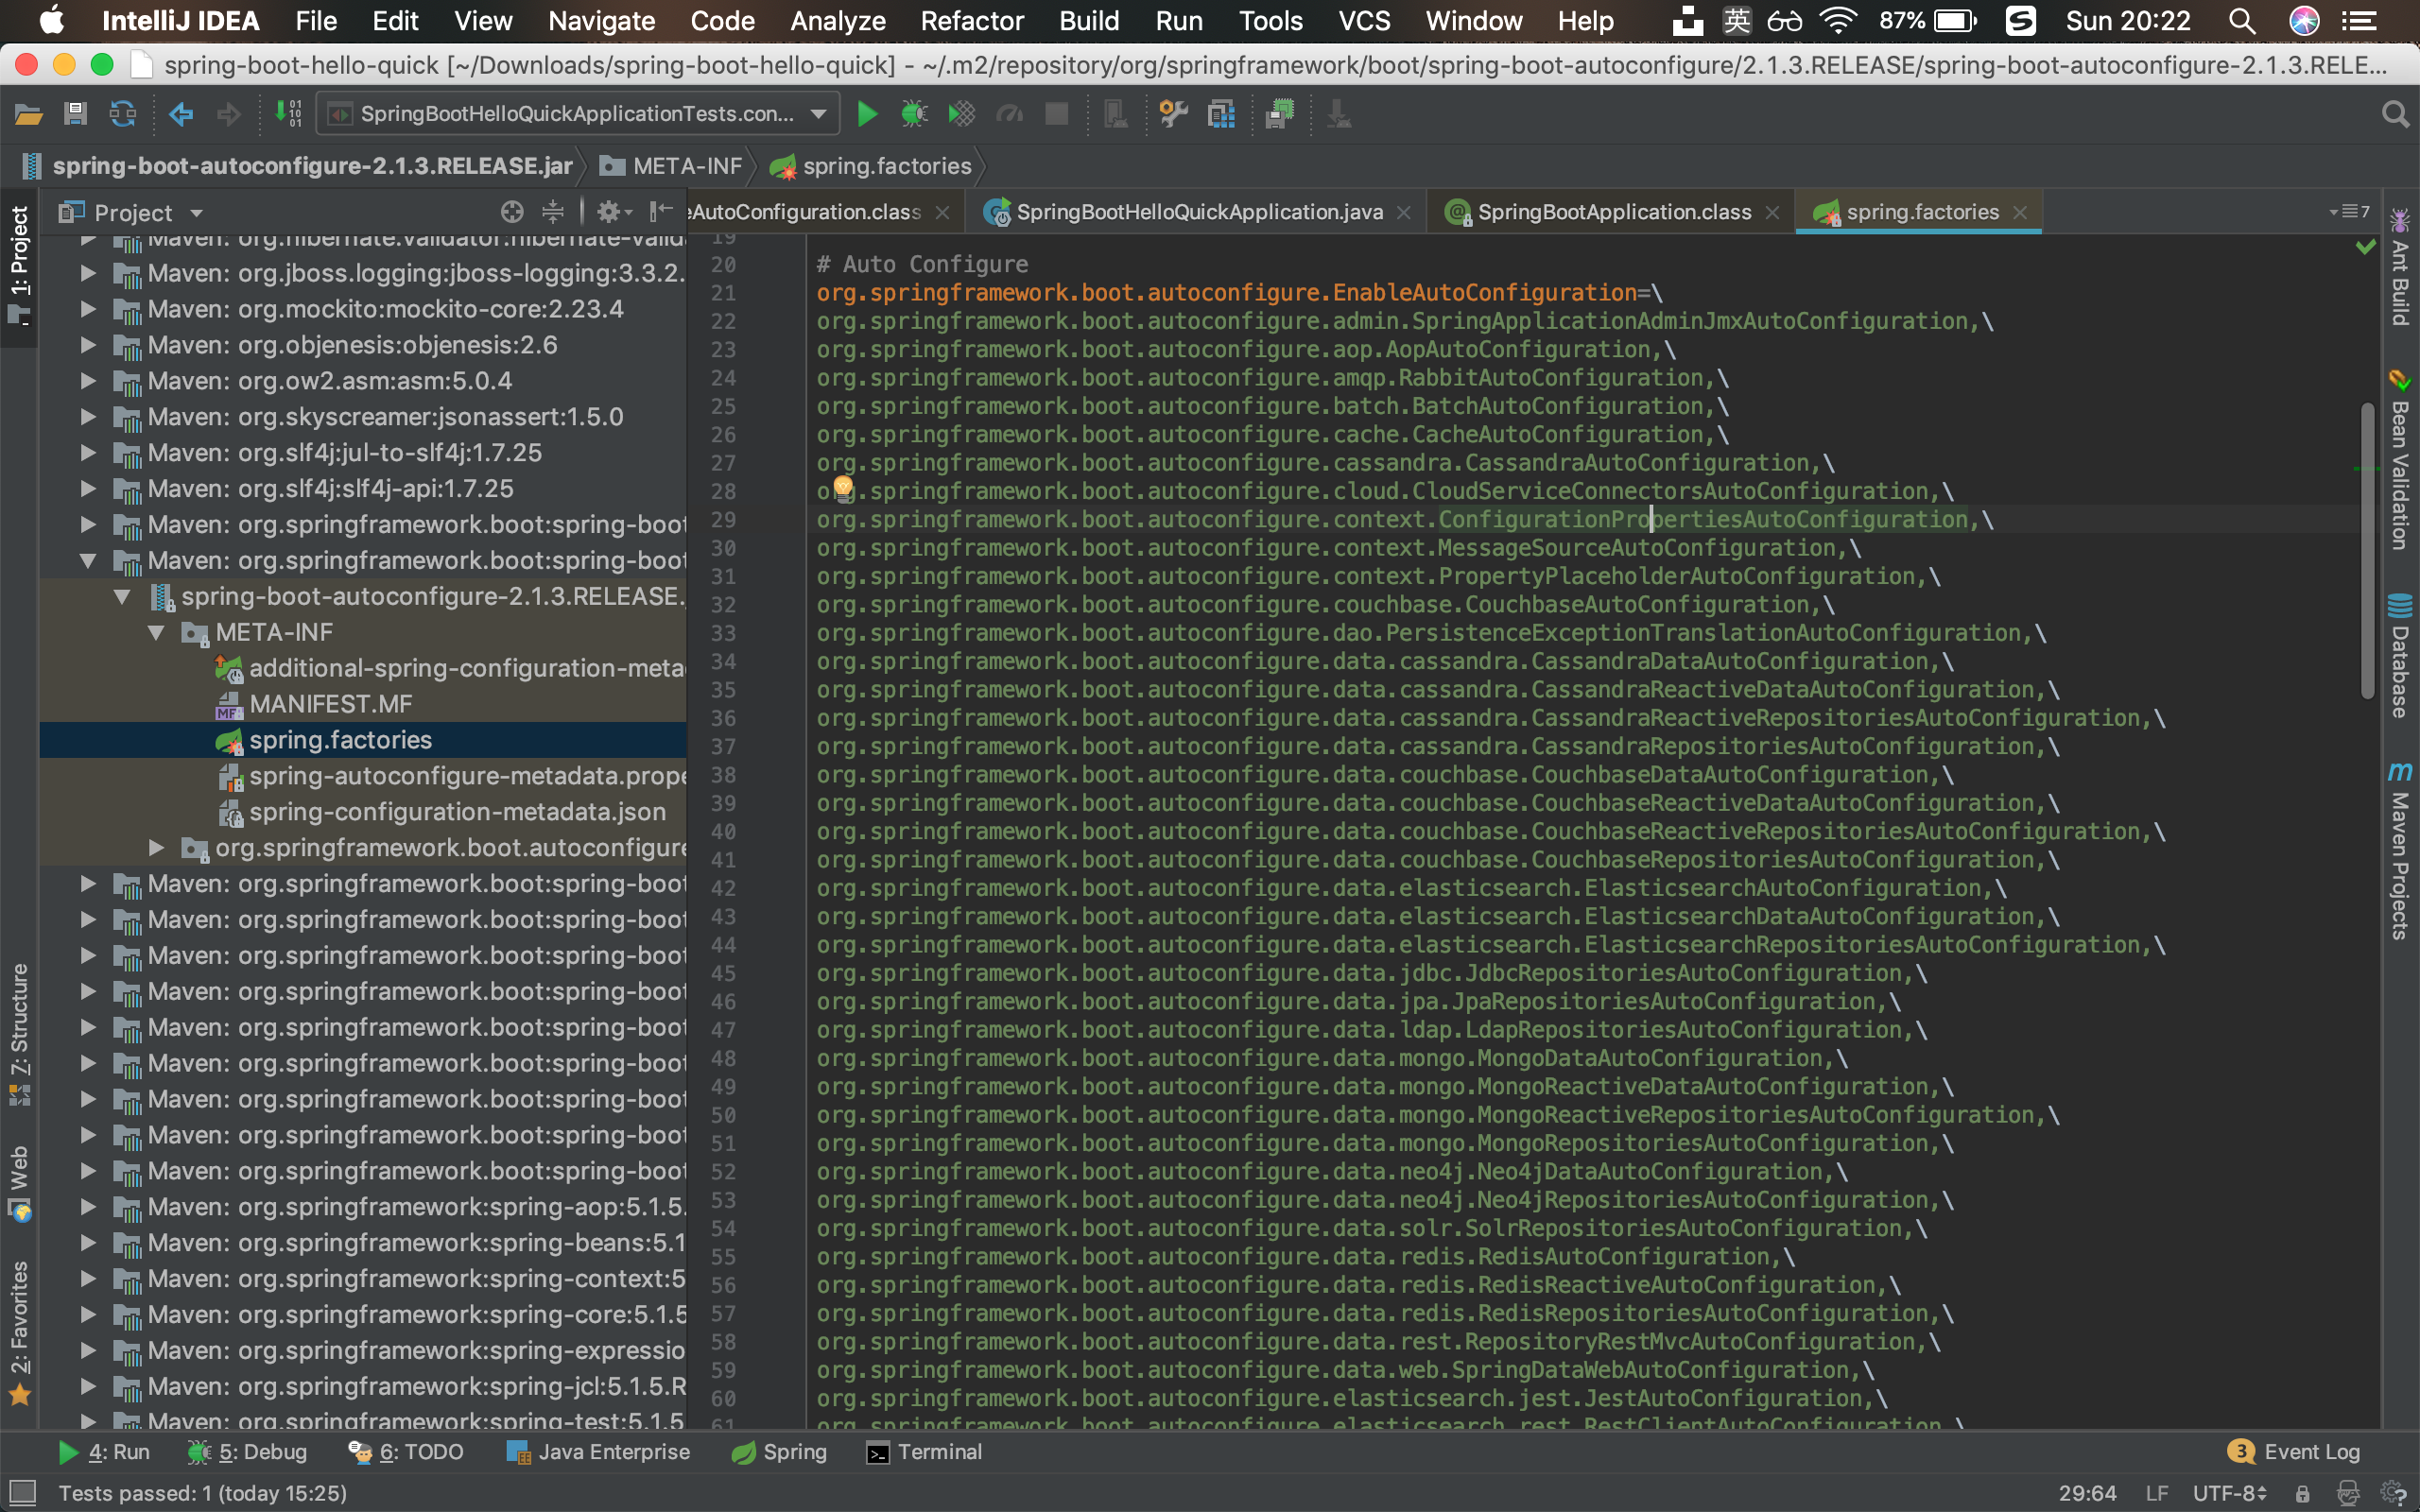
扫描所有jar包(即Maven导入的jar包)类路径下的”META-INF/spring.factories”,把扫描到的这些文件的内容包装成Properties对象,从properties中获取到EnableAutoConfiguration.class类对应的值,然后把它们添加在容器中。
1 2 3 4 5 6 7 8 9 10 11 12 13 14 15 16 17 18 while (urls.hasMoreElements()) { URL url = (URL)urls.nextElement(); UrlResource resource = new UrlResource(url); Properties properties = PropertiesLoaderUtils.loadProperties(resource); Iterator var6 = properties.entrySet().iterator(); while (var6.hasNext()) { Entry<?, ?> entry = (Entry)var6.next(); String factoryClassName = ((String)entry.getKey()).trim(); String[] var9 = StringUtils.commaDelimitedListToStringArray((String)entry.getValue()); int var10 = var9.length; for (int var11 = 0 ; var11 < var10; ++var11) { String factoryName = var9[var11]; result.add(factoryClassName, factoryName.trim()); } } }
容器中添加的类 将类路径下”META-INF/spring.factories”里配置的所有EnableAutoConfiguration的值添加到了容器中。
每一个xxxAutoConfiguration类都是容器中的一个组件,并且都加入到容器中。加入到容器中之后的作用就是用它们来做自动配置,这就是Spring Boot自动配置之源,也就是自动配置的开始,只有这些自动配置类进入到容器中以后,接下来这个自动配置类才开始进行启动。
举例说明 每一个自动配置类进行自动配置功能 以一个自动配置类HttpEncodingAutoConfiguration(HTTP的编码自动配置)为例子来解释Spring Boot的自动配置的原理:
1 2 3 4 5 6 7 8 9 10 11 12 13 14 @Configuration @EnableConfigurationProperties ({HttpProperties.class})@ConditionalOnWebApplication ( type = Type.SERVLET ) @ConditionalOnClass ({CharacterEncodingFilter.class})@ConditionalOnProperty ( prefix = "spring.http.encoding" , value = {"enabled" }, matchIfMissing = true ) public class HttpEncodingAutoConfiguration ... }
查看HttpProperties源代码:
1 2 3 4 5 6 @ConfigurationProperties (prefix = "spring.http" ) public class HttpProperties ... }
所以配置文件中该配置什么,我们就按照它的目的,它要配spring.http.encoding这个属性,这个属性里边能配置什么值,就对应HttpProperties这个类来配置,所有的配置文件中能配置的属性都是在xxx.Properties类中封装着的。所以配置文件能配置什么就可以参照某一个功能对应的这个属性类。
1 2 3 4 5 6 7 8 9 10 11 12 13 14 15 16 17 18 19 20 21 22 23 24 25 26 27 28 29 30 31 32 33 34 35 36 37 38 39 40 41 42 43 44 45 46 47 48 49 50 51 52 53 54 55 56 57 58 59 60 61 62 63 64 65 66 67 68 69 70 71 72 73 74 75 76 77 public static class Encoding public static final Charset DEFAULT_CHARSET; private Charset charset; private Boolean force; private Boolean forceRequest; private Boolean forceResponse; private Map<Locale, Charset> mapping; public Encoding () this .charset = DEFAULT_CHARSET; } public Charset getCharset () return this .charset; } public void setCharset (Charset charset) this .charset = charset; } public boolean isForce () return Boolean.TRUE.equals(this .force); } public void setForce (boolean force) this .force = force; } public boolean isForceRequest () return Boolean.TRUE.equals(this .forceRequest); } public void setForceRequest (boolean forceRequest) this .forceRequest = forceRequest; } public boolean isForceResponse () return Boolean.TRUE.equals(this .forceResponse); } public void setForceResponse (boolean forceResponse) this .forceResponse = forceResponse; } public Map<Locale, Charset> getMapping () return this .mapping; } public void setMapping (Map<Locale, Charset> mapping) this .mapping = mapping; } public boolean shouldForce (HttpProperties.Encoding.Type type) Boolean force = type != HttpProperties.Encoding.Type.REQUEST ? this .forceResponse : this .forceRequest; if (force == null ) { force = this .force; } if (force == null ) { force = type == HttpProperties.Encoding.Type.REQUEST; } return force; } static { DEFAULT_CHARSET = StandardCharsets.UTF_8; } public static enum Type { REQUEST, RESPONSE; private Type () } } }
容器中处理 @EnableConfigurationProperties(HttpEncodingProperties.class)注解,这个@EnableConfigurationProperties注解的作用就是把HttpEncodingProperties.class和配置文件进行绑定起来并把HttpEncodingProperties加入到容器中。接下来这个自动配置类,通过一个有参构造器把这个属性拿到,而这个属性已经和Spring Boot映射了,接下来要用什么编码,就是拿到HttpEncodingProperties这个类里边的属性。所以Spring Boot能配置什么,如果它要设置编码,就是获取properties里边getCharset()方法拿到name值。
总结
SpringBoot启动会加载大量的自动配置类。 所要做的就是我们需要的功能,Spring Boot有没有帮我们写好自动配置类。 如果有就再来看这个自动配置类中到底配置了哪些组件,Spring Boot自动配置类里边只要我们要用的组件有,我们就不需要再来配置了,但是如果说没有我们所需要的组件,那么我们就需要自己来写一个配置类来把我们相应的组件配置起来。 给容器中自动配置类添加组件的时候,会从properties类中获取某些属性,而这些属性我们就可以在配置文件指定这些属性的值。